Sunday, October 31, 2010

Savory Pumpkin Puffs

In keeping with the pumpkin theme I decided the make pumpkin puff pastry puff buns for our Halloween hamburgers.  The kids and my husband really enjoyed these biscuits although they were a little hard for the kids to hold without breaking the 'bun'.  However they would also be really good served on their own as an appetizer or side dish, and as an extra bonus they were really easy!


Original recipe here

Ingredients
Makes 18 to 24


1 puound lean ground chickenAll-purpose flour, for parchment
1 standard package (17.3 ounces) frozen puff pastry, thawed
1 1/2 teaspoons paprika
1/4 cup unsalted butter, melted
2 1/2 tablespoons Dijon mustard
1 1/2 cups finely grated Gruyere cheese
1 cup finely grated Parmesan cheese
Freshly ground pepper

Directions

Preheat oven to 375 degrees. Generously flour two pieces of parchment paper; on each, roll out an unfolded pastry sheet to form a 15-by-13-inch rectangle, about 1/16 inch thick. Refrigerate until firm, about 15 minutes. Meanwhile, stir the paprika into the melted butter.
Remove pastry from the refrigerator, and brush off excess flour. Spread a rectangle of pastry with mustard; sprinkle with both cheeses. Season with pepper. Lay a second pastry rectangle on top.
Place a sheet of parchment on top of the stacked pastry; using a rolling pin, roll until smooth and pastry layers are sealed together. Remove parchment, and brush top of pastry with butter mixture. Chill until firm, about 30 minutes.
With a pumpkin-shaped cookie cutter, cut into 18 to 24 shapes. Immediately place the shapes on a parchment-lined baking sheet. Using a sharp paring knife, score each shape four or five times to make pumpkin ridges. Bake until golden, 15 to 20 minutes. Transfer puffs to a wire rack; let cool slightly before serving.

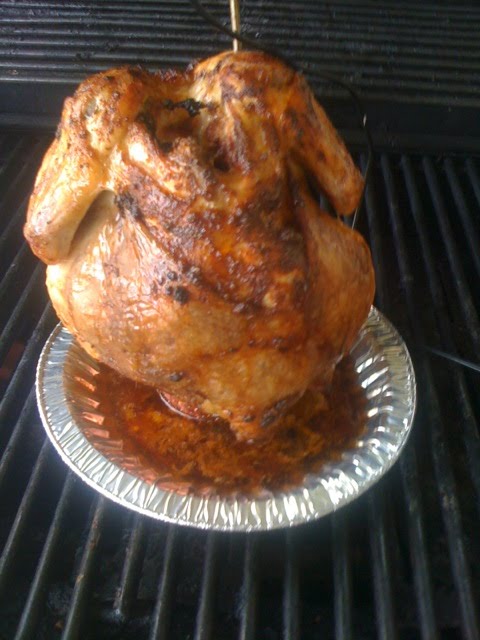
Meanwhile shape the ground chicken into small patties and BBQ.  When the puff pastries are done place on chicken hamburger on one and then top with another pumpkin puff pastry.  Enjoy!

pumkin pizza dough

Since it is Halloween and the kids were having a pumpkin party I wanted to keep with the theme and make a pumpkin pizza dough. I found the following recipe and decided to give it a try.  You could not taste the pumpkin in the dough, it just made it a really nice orange colour and make the dough really moist.  I am going to try this again using different vegetables and see what happens!


Pizza dough
1 cup warm water
1 envelope active dry yeast
2 tablespoon agave nectar
1/2 cup canned pumpkin
2 tablespoons olive oil
1-1/2 teaspoons coarse kosher salt
3-1/2 cups unbleached bread flour 
Pesto
1/2 cup pine nuts
10 oz of arugula
1/2 Parmesan cheese
1 garlic clove
1/2 cup olive oil

STEP 1:
Pour the warm water into a medium bowl and whisk in the yeast. Let sit until frothy -- about 10 minutes. Then add your agave nectar, olive oil, and pumpkin -- whisk until smooth.
STEP 2:
Whisk together the flour and salt in a large bowl. With you fist, make an impression in the center -- a "bowl" that's big enough to pour your wet ingredients into. Then pour in your wet ingredients.
STEP 3:
Start pulling everything together with a spatula. When you can no longer mix, use your hands to start kneading the dough. Keep kneading -- and adding more flour as necessary -- until you have a ball that's elastic, but not sticky.
STEP 4:
Lightly oil another large bowl and put your dough ball inside it -- flipping over once to coat both sides (again -- lightly) with oil. Cover with a damp towel or plastic wrap and let rise for 2 hours.
STEP 5 .
Place pine nuts on a cookie sheet and toast in a 350 oven for 10 minutes.  Cool.  Combine pine nuts, arugula, cheese, and garlic in a food processor and pulse.  Once it is fine add the oil into you get a thick pasta.  Set aside.
STEP 6
Once the dough has risen, preheat your oven to 425 degrees F. Roll out the pizza dough and add the pesto. Top with the toppings of your choice. I added chicken, red onions, cheese and yellow pepper. Bake pizza for 20 minutes. Enjoy! ,

Friday, October 29, 2010

Pumpkin Graham Crackers

In keeping with the halloween pumpkin theme I decided to make pumpkin graham crakers.  The origianl recipe can be found here.  These were cute and my kids seemed to like them, I don't think that they realized they have actual pumpkin in them.


Pumpkin Graham Cracker Recipe

2 T (1/4 stick) unsalted butter, softened
2 T pumpkin puree
1 egg
6 T sugar
4 T honey
1/2 t baking soda
1 t ginger
1 t nutmeg
1 t cinnamon
3/4 t allspice
2 t water
3/4 t salt
1 1/2 C whole wheat flour
3/4 C all-purpose flour
Combine the butter, pumpkin, egg, and sugar in a bowl and beat until smooth and creamy.
Stir in the honey.
Dissolve the baking soda in the water and add to the butter mixture.
Add the salt, graham flour, all-purpose flour, and spices to the mixture and blend thoroughly. The dough should hold together and be manageable. If it is too tacky, add a little more graham flour.
Liberally dust a surface with graham flour and roll the dough to a thickness of about 1/8 inch.

Use your cookie cutters to cut out pumpkins or any other shape.

Use the tines of a fork to make Jack O' Lantern faces on the pumpkins.
Using a spatula, place the pumpkin graham crackers on an ungreased cookie sheet.
Bake at 350 F for 15 minutes.

Remove from the oven and cool on racks. They won't be hard when you first take them out of the oven, but they will harden as they cool.

Pumpkin Cheese Crackers

My kids are having a pumpkin costume party on Saturday. In keeping with the theme I wanted to serve pumpkin snacks.  I decided to adapt the the goldfish cracker recipe I saw here into pumpkin crackers for Halloween.  These are very cheesy and their taste tops the store bought ones hands down.  These are also super easy to make since all of the ingredients are just thrown into the food processor. You don't even have to grate the cheese! What could be easier!

Pumpkin Cheese Crackers
1 C whole wheat  flour
4 T cold unsalted butter, cut into small pieces
8 oz cheddar cheese cut into cubes (whatever kind of cheese is your favourite)
1/2 t salt
1/2 t fresh-ground pepper

Pulse the flour, butter, cheese, salt, and pepper together using a food processor until the mixture resembles coarse meal.
Pulse in 3 to 4 tablespoons of water, one tablespoon at a time, and only enough so that the dough forms a ball and rides the blade.
Remove, wrap in plastic, and chill for 20 minutes or up to 24 hours.
Line 2 baking pans with parchment paper and set aside.
Roll the dough out to 1/8-inch thickness. (If you roll it thicker, it will still work, but the crackers won't be quite as crunchy. This dough rolled out so easily; you'll wish that you always worked with cheddar!)
Cut out as many crackers as possible.
Place them 1 inch apart on the prepared baking pans.
Bake at 350 F until golden and crisp - 15 to 20 minutes.

Thursday, October 28, 2010

Savory Mummy Meatloaf

I was browsing the web for Halloween supper ideas and I came across a mummy meatloaf recipe here.  My kids enjoy meatloaf so I thought they would enjoy this supper.  I served it with swamp thing macaroni.  I adapted a meatloaf recipe from this book that my dad gave me.  While the meatloaf was tasty, the cheese did not work.  I thought that American cheese meant processed cheese slices which I do not usually buy but decided that my kids could have as a treat, the cheese just melted right off.  If anyone knows what exactly American cheese slices are please let me know!  At least it still tasted good!


Savory Mummy Meatloaf
2 pounds lean ground chicken
1/4 cup onions
1 cup oatmeal
1 egg
2 1/2 teaspoons salt
1/4 teaspoon pepper
1 teaspoon mustard
1/4 cup BBQ sauce
1 cup spaghetti sauce

Preheat oven to 350 degrees.  Combine beef, onions, oatmeal, egg, salt, pepper, mustard, BBQ sauce and spaghetti sauce.  Mix well.  Shape loaf to resemble a mummy's body with crossed arms.  Bake 45 minutes.  Remove from oven.  Let it rest about 3 minutes, then lay 1-inch-wide strips of American cheese across the body as shown, leaving a narrow space on the head for the hot dog slice eyes. Trim any overhanging cheese with scissors and return the mummy to the still-warm oven to slightly melt the cheese, about 1 minute.
Mummy meatloaf

Swamp Things

I decided to make some Halloween meals as a special treat for my kids.  Again I saw a picture of this recipe and decided to make it for my kids.  My mother-in-law has just given me this cookbook so I decided to try the macaroni and cheese recipe from it.  My kids did not mind the macaroni and cheese but my husband and I found it to be a little bit pasty.  I might try it again but add some meat to flavour it a little bit more.  I served it with savory mummy meatloaf.


Macaroni and Cheese
1 1/2 cups elbow macaroni
1 TBSP Olive Oil
1 TBSP all purpose flour
1/2 cup nonfat milk
1/2 cup purred butternut squash
11/2 cups shredded cheese
4 ounces cream cheese
1/2 tsp salt
1/8 tsp paprika
1/8 tsp pepper

1. Bring a large pot of salted water to boil, add the macaroni, and cook according to package directions until al dente.  Drain.
2.  While the macaroni is cooking add the oil, then the flour to a large saucepan and cook stirring constantly, until the mixture resembles a thick paste but has not browned, 1 to 2 minutes.
3.  Add the milk and whisk until mixture begins to thicken, 3 to 4 minutes.  Add the squash, cheddar cheese, cream cheese and seasonings and stir until the cheese is melted and the sauce is smooth.  Stir in the macaroni.
4.  Spoon it into greased muffin cups and bake until firm, about 25 minutes. 
5.  Let the creatures rest for about 10 minutes, then gently remove them from the tins. Place them upside down and add hot dogs slices for eyes.


    Wednesday, October 27, 2010

    Halloween Blondies


    These were another Martha Stewart cookie of the day.  I like blondies and so I decided to try them and I was not disappointed.  These are a moist gooey, fudgey, brownie my favourite kind!  If you like the cakey kind do not make these you will not like them.  They were also really easy to make, no beaters and only one bowl!  My kind of recipe!


    Halloween Blondies
    Ingredients
    1 cup (2 sticks) unsalted butter, melted, plus more, room temperature, for pan
    1 cup packed light-brown sugar
    1/2 cup granulated sugar
    2 large eggs
    1 1/2 teaspoons pure vanilla extract
    2 cups all-purpose flour (spooned and leveled)
    1 1/2 teaspoons coarse salt
    1 teaspoon baking powder
    1/4 cup each orange, yellow, and brown candy-coated chocolates (from a 12.6-ounce bag)

    Directions
    Preheat oven to 350 degrees. Brush an 8-inch square baking pan with butter; line pan with parchment paper, leaving a 2-inch overhang on two sides. Butter paper.
    In a large bowl, whisk together butter and sugars until smooth. Whisk in eggs and vanilla. Add flour, baking powder and salt; stir just until moistened. Transfer batter to prepared pan and smooth top. Arrange candies in 12 rows (2 rows per color, repeating once) on top of dough.
    Bake until top of cake is golden brown and a toothpick inserted in center comes out clean, 45 to 50 minutes. Set pan on a wire rack and let cool completely. Using parchment overhang, lift cake from pan and transfer to a cutting board; cut into 16 squares. (To store, keep in an airtight container at room temperature, up to 2 days.)

    Roasted Butternut Squash Ravioli with a Sage Brown Butter Sauce

    I have a confession to make, I ate the filling for this ravioli right out of the pan.  I could not help myself.  It smelled so yummy!  This was supper was surprisingly easy and very tasty.  The trick is to use the won ton wrappers instead of making your own pasta dough.  They are already in convenient triangles for you.  My kids really liked the brown butter sauce and were disappointed when I told them they were not allowed to eat it right out of the bowl but had to have it on their pasta.  


    Roasted Butternut Squash Ravioli with a Sage Brown Butter Sauce
    Ingredients
    9 tablespoons butter
    1/2 an onion minced
    1 cup roasted butternut squash puree
    Salt
    Freshly ground white pepper
    3 tablespoons grated Parmigiano-Reggiano cheese, plus 2 ounces
    Pinch nutmeg
    Won ton Wrappers

    Directions
    1.  In a large saute pan, over medium heat, melt 1 tablespoon of the butter. Add the onion and saute for 1 minute. Add the squash puree and cook until the mixture is slightly dry, about 2 to 3 minutes. Season with salt and pepper. Remove from the heat and stir in 3 tablespoons cheese and nutmeg, to taste. Season with salt and pepper. Cool completely.
    2.  Separate the won ton wrappers.  Place 2 teaspoons of the filling in the center of each won ton square. Bring 1 corner of the square to the other, forming a triangle and seal the pasta completely. Add the pasta to pot of boiling salted water. Cook untilal dente, about 2 to 3 minutes or until the pasta floats and is pale in color.
    3.  Remove the pasta from the water and drain well. Season the pasta with salt and pepper.
    4.  In a large saute pan, melt the remaining 8 tablespoons of butter. Add the sage to the butter and continue to cook until the butter starts to brown. Remove from the heat.
    5.  Place some of the pasta in the center of each serving plate. Spoon the butter sauce over the pasta. Sprinkle the 2 ounces of cheese over each plate.

    Tuesday, October 26, 2010

    Raisin Date Loaf

    During the process of making this cockroach cake that my kids discovered they really liked dates.  I wanted to make them something different for lunch so I tried the following Anna Olsen recipe found here.  The loaf was very moist and flavourful.  My kids even asked for thirds!  Success!


    Raisin Date Loaf
    Ingredients
    1 1/2 cups chopped pitted dates
    1 cup orange juice
    1 1/2 cups all-purpose flour
    1/2 cup sugar
    1 teaspoon baking soda
    1/2 teaspoon baking powder
    1/4 teaspoon salt
    1/4 teaspoon ground cloves
    1 large egg
    1/4 cup vegetable oil
    3/4 cup golden raisins


    Directions
    Preheat oven to 350°F and grease an 8 1/2-x-4 1/2-inch loaf pan.
    Bring dates and orange juice up to a simmer. Remove from heat and let cool to room temperature. In a bowl, sift flour, sugar, baking soda, baking powder, salt and cloves. In a separate bowl, whisk together egg and oil. Add egg mixture and dates to flour mixture and stir just until blended. Stir in raisins. Scrape into prepared pan and bake for about 45 minutes, until a tester inserted in the center of the cake comes out clean. Let cake cool for 10 minutes, then turn out to cool completely.

    Buttermilk Pecan Pancakes

    I had some leftover buttermilk that needed to be used to I gave my kids the choice of pancakes or waffles for supper.  They chose pancakes.  I used this recipe to make buttermilk pecan pancakes.  They were okay pancakes.  The kids liked them and they tasted good but they were not anything special.


    Buttermilk Pecan Pancakes
    Ingredients
    2 cups unbleached all-purpose flour
    3 tablespoons sugar
    1/2 teaspoon table salt
    1 teaspoon baking powder
    1/2 teaspoon baking soda
    2 cups buttermilk
    2 large eggs
    1/4 cup unsalted butter, melted and cooled, plus more for frying
    Vegetable oil, for frying
    Chopped pecans, to distribute over pancakes
    Directions


    Preheat the oven to 200 degrees F.

    Whisk the flour, sugar, salt, baking powder, and baking soda together in a large bowl.

    Add the buttermilk, eggs, and cooled melted butter to a second bowl and whisk to combine.

    Make a well in the center of the dry ingredients and add the wet mixture. Stir with a rubber spatula until just combined. Do not overmix or you will end up with tough and chewy pancakes.

    Heat a large electric griddle or nonstick frying pan over medium heat. Add a few drops of vegetable oil and a pat of butter. Once butter melts, wipe skillet with a paper towel. Ladle about 1/4 cup ofbatter onto the griddle for each pancake. Evenly distribute chopped pecans on top of the pancakes. Cook the pancakes until the bubbles begin to burst on the surface, about 3 minutes, flip and continue cooking until the second side is a nice golden brown, about 2 more minutes. Repeat with remaining pancakes.

    Put the finished pancakes onto a sheet tray and let sit in the oven to stay warm as you finish.

    Arrange the pancakes on individual plates and serve with the syrup.

    Monday, October 25, 2010

    Romano Risotto stuffed Sweet Dumpling Squash and Melted Monsters!

    When I saw the picture of the following recipe on someone else's blog I knew I was going to make it.  It looked, warm, yummy and inviting.  Exactly how fall makes me fell and quite frankly what is not to like about risotto stuffed into a sweet dumpling squash?  This recipe was simple to make yet it looks like you spent hours working on it!  However I do have a confession to make.  While my husband and I enjoyed this lovely squash for dinner my kids had monster pizza.  I cut processed cheese slices into pieces laid them across English muffins and then cut bologna into circles for eyes.  I had seen this in a magazine and thought it would be cute to make around Halloween. (I also thought that they used processed cheese, apparently I was wrong!).  Unfortunately the processed cheese all ran together and it kind of lost the effect. It was a good effort and the kids did not seem to mind eating it.  I have included a picture of the melted monster!


    Romano Risotto stuffed Sweet Dumpling Squash
    yield: 4 portions
    2 Sweet Dumpling Squash, halved and seeded

    Salt, Pepper, Nutmeg
    1/2 Onion, small dice
    1 TBS Butter
    2 cups Arborio Rice
    4 cups Stock (chicken or vegetable)
    Salt, Pepper
    1/2 cup Romano Cheese
    Red Pepper Flakes

    1. Cut the butternut sweet dumpling squash in half long ways, and scoop out the seeds. Discard the seeds and rub salt, pepper and nutmeg into the squash on both sides. Roast in a 325 degree oven for 45 minutes on both sides. This can be done ahead of time.
    2. Warm up your stock until very hot and keep warm on the side.
    3. Cut up your onion and saute in the butter along with the mince garlic, until translucent and aromatic, about 5 minutes. Use a large pot.
    4. Add the arborio rice and stir for three minutes on low heat. Add two cups of the warm stock and let simmer until the liquid has been almost all absorbed, stirring constantly. Add another cup of stock and let simmer until absorbed. Add the last cup of stock. Simmer until most of the liquid has been absorbed and the risotto is al dente (you must taste this to make sure its cooked all the way, it will take around 15 minutes and will absorb around 4 cups of stock)
    5. Turn the heat to low, add your cheese and stir. I like to put a lid on the pot to let the cheese slowly melt. You have now made risotto!
    6. Scoop the risotto into the squash and bake for 5 minutes at 350 degrees. Turn the oven off and turn the broiler on high, placing the squash under the broiler until the cheese is browned and crispy (the cheese I used didn’t brown well.) Top with a red pepper flakes and nutmeg. Enjoy!

    Sunday, October 24, 2010

    Mini Meatball Sandies


    I confess I decided to make these for supper because I wanted something that all my kids would eat without complaining and I was successful! They all gobbled these up and even asked for more! I think I might make these again for the kids as a lunch because they were so popular!


    Original recipe
     here

    Mini Meatball Sandies
    Ingredients
    1/4 cup finely crushed corn cereal
    1 tablespoon chopped fresh flat-leaf parsley
    1 large egg, lightly beaten
    1/2 tablespoon olive oil
    1 tablespoon ketchup, plus more for serving
    2 tablespoons grated Romano cheese
    1/4 teaspoon kosher salt
    1/4 teaspoon freshly ground black pepper
    1/2 pound extra lean ground beef
    Directions

    1.  12 (2 1/2-inch-diameter) sweet dinner rolls, halved
    2.  Put an oven rack in the center of the oven. Preheat the oven to 375 degrees F. Line a baking sheet with parchment paper and set aside.
    3.  In a medium bowl, stir together the cereal, parsley, egg, oil, 1 tablespoon ketchup, cheese, salt, and pepper. Add the ground beef and gently stir to combine. With damp hands, roll the mixture into 12 mini meatballs. Arrange the meatballs on the prepared baking sheet and bake until cooked through, about 15 minutes Cool for 10 minutes.
    5.  Make an indentation in the center of the bottom half of a roll. Slice a meatball in half and put in the indentation. Add about 1 teaspoon of ketchup to the meatballs and cover with the top half of the roll. Repeat with the remaining rolls and filling.
    6.  Arrange the sandies on a platter and serve.

    Friday, October 22, 2010

    Barley Risotto Stuffed Mushrooms

    I have been inspired to start stuffing stuff, like my husband's belly.  The other night when I was making the Healthy Chile Relleno, I was thinking what else could I stuff.  When I was at the grocery store and saw the discount portabella mushrooms and I knew that I could not pass them up.  Today I had an inspiration, barley risotto stuffed mushrooms.  These were yummy, although my kids did not think so.


    Ingredients
    4 or 5 cups of chicken broth
    4 slices bacon, thinly chopped
    2 onions, peeled and chopped
    6 cloves garlic, chopped
    1 cup barley, pearl or pot
    Salt and pepper
    1/2 teaspoon sage
    8 Portabella Mushroom caps
    Olive Oil
    Salt and Pepper
    Parmigiana regianno cheese


    Directions
    In one pot heat the broth to a gentle simmer.
    In another pot fry the bacon over medium-high heat, until crisp and golden brown.
    Add the onions and garlic and sauté until soft and golden.
    Add the barley and stir for a few moments until well coated with bacon fat and heated through.
    Add 1 cup or so of the hot chicken broth and stir until it is fully absorbed. Continue to add broth, 1 ladle-full at a time, letting it absorb fully before adding the next ladle.
    Continue simmering until the barley is tender.
    Season to taste with salt and pepper. Stir in sage.
    Meanwhile brush the mushrooms with olive oil and season both sides with salt and pepper.  Grill for 10 to 12 minutes flipping halfway through.  Remove from grill.  Fill with the warm risotto and top with cheese.

    Thursday, October 21, 2010

    Crispy Chocolate-Marshmallow Treats

    Recently my son and I made a rat cake for our local fair. As part to the rat cake I made marshmallows from scratch because we needed a giant marshmallow to make the rats nose as a result I had a lot of leftover marshmallow needing to be used. Enter Martha Steward of her cookie of the day recipe. I saw these rice krispee treats and knew I had my answer. These were yummy and while I enjoyed the chocolate I think that I still prefer traditional rice krispee squares but if you really like chocolate these are for you!


    Crispy Chocolate-Marshmallow Treats
    Ingredients

    Makes 16
    6 tablespoons unsalted butter, plus more for pan
    1 bag (10 1/2 ounces) mini marshmallows
    1/4 cup unsweetened Dutch-process cocoa (spooned and leveled)
    6 cups crisp rice cereal
    2 ounces bittersweet chocolate, melted

    Directions
    Butter an 8-inch square baking pan. Line bottom and two sides with parchment paper, leaving a 2-inch overhang on both sides. Butter paper; set pan aside.
    In a large saucepan, combine butter, marshmallows, and cocoa. Cook over medium, stirring frequently, until melted, about 6 minutes; stir in rice cereal. Press rice mixture into prepared pan; drizzle with melted chocolate. Let cool to room temperature; cut into 16 bars. (To store, keep in an airtight container at room temperature, up to 5 days.)


    Wednesday, October 20, 2010

    Pumpkin Cookies with Brown Butter Icing

    As I mentioned before I get a daily cookie recipe from Martha Stewart. These cookies were one of the recent cookies of the day. As soon as I saw the recipe I knew I was going to make the cookies. I love brown butter. It has a deep nutty caramel flavour to it. It makes anything taste good. The cookies are almost cake like and while I was icing them I thought, "Hey these would make good woopie pies". So I turned some of them into woopie pies (plus I was running low on icing). Everyone in my family liked these cookies. My one son even commented "I like them even though they are pumpkin".


    Ingredients

    Makes about 6 dozen
    FOR THE COOKIES 
    2 3/4 cups all-purpose flour 
    1 teaspoon baking powder 
    1 teaspoon baking soda 
    1 1/4 teaspoons coarse salt 
    1 1/2 teaspoons ground cinnamon 
    1 1/4 teaspoons ground ginger 
    3/4 teaspoon ground nutmeg 
    3/4 cup (1 1/2 sticks) unsalted butter, softened 
    2 1/4 cups packed light-brown sugar 
    2 large eggs 
    1 1/2 cups canned solid-pack pumpkin (14 ounces) 
    3/4 cup evaporated milk 
    1 teaspoon pure vanilla extract 
    FOR THE ICING 
    4 cups confectioners' sugar, sifted 
    10 tablespoons (1 1/4 sticks) unsalted butter 
    1/4 cup plus 1 tablespoon evaporated milk, 
    2 teaspoons pure vanilla extract 

    Directions
    Make cookies: Preheat the oven to 375 degrees. Whisk together flour, baking powder, baking soda, salt, cinnamon, ginger, and nutmeg in a medium bowl; set aside. 
    Put butter and brown sugar in the bowl of an electric mixer fitted with the paddle attachment. Mix on medium speed until pale and fluffy, about 3 minutes. Mix in eggs. Reduce speed to low. Add pumpkin, evaporated milk, and vanilla; mix until well blended, about 2 minutes. Add flour mixture; mix until combined. 
    Transfer 1 1/2 cups batter to a pastry bag fitted with a 1/2-inch plain tip (such as Ateco #806). Pipe 1 1/2-inch rounds onto parchment-lined baking sheets, spacing 1 inch apart. Bake cookies, rotating sheets halfway through, until tops spring back, about 12 minutes. Cool on sheets on wire racks 5 minutes. Transfer cookies to wire racks; let cool completely. 
    Make icing: Put confectioners' sugar in a large bowl; set aside. Melt butter in a small saucepan over medium heat. Cook, swirling pan occasionally, until golden brown, about 3 minutes. Immediately add butter to confectioners' sugar, scraping any browned bits from sides and bottom of pan. Add evaporated milk and vanilla; stir until smooth. Spread about 1 teaspoon icing onto each cookie. If icing stiffens, stir in more evaporated milk, a little at a time. Cookies can be stored in single layers in airtight containers at room temperature up to 3 days. 


    Tuesday, October 19, 2010

    Healthy Chile Relleno

    I saw the following meal on someone else's blog. It looked so appetizing I decided to try it. However I has some mishaps when I was preparing this meal. My kids came inside from playing in the backyard covered in dirt and I had to give them a bath. I had already put the peppers on the grill but I thought they would be okay because I was just going to rinse the kids off. I forgot about the peppers. They were a little black. It was a good thing I had to peel the outside skin off, however they were a little overcooked so they did not hold their shape. That being said supper turned out relatively well. I was a little worried that my husband would not like it since he is not a big pepper fan but he said that it was good and even had a second helping. I must confess that I did not feed it to my children maybe next time I try it I will.


    Healthy Chile Relleno
    Original recipe here


    yield: 2 portions

    1 Red Pepper
    1 cup Refried Beans (recipe below)
    1/2 cup Brown Rice, cooked
    1/2 cup Corn, frozen or fresh
    1/2 cup Panko Bread Crumbs
    Pan Spray
    Low Calorie Ranchero Sauce (recipe below)
    2% Cheddar Cheese, shredded

    preheat oven to 400 degrees

    1. Roast the pepper either in the oven (10 min), on the grill (5 min)
    2. Place the pepper in an airtight container and let steam for 10 minutes. Then remove the charred pieces of flesh from the pepper and cut in half longways. Remove the seeds and membrane. Pat the inside of the pepper dry.
    3. Smear a 1/2 cup of beans into each pepper half. Top with brown rice (1/4 cup each pepper), the corn and the panko.
    4. Spray the pan and the pepper with butter/pan spray, and bake for 15 minutes.
    5. Remove from the oven and top with the sauce and cheese. Turn your broiler on and place under the broiler for 5 minutes, until the cheese is bubbly. If you have no broiler bake for an additional 5 minutes until the cheese is melted.

    5 Minute Healthy “Refried” Beans

    yield: 1 – 1/2 cup
    1 tsp Oil (any)
    1/2 an Onion, small dice1 can Pinto Beans, drained and rinsed
    1 tsp Salt, Pepper, Cumin, Smoked Paprika
    1/4 cup Vegetable Stock

    1. Add oil to a saute pan and add the onions. Cook until aromatic and soft, about 4 minutes.
    2. Add the onions, beans, and seasonings to a food processor and pulse until pureed. Add the vegetable stock to thin out until you reach your desired consistency. I like mine on the thick side.

    Low Calorie Ranchero Sauce

    yield: 1 cup sauce
    1 cup salsa any variety (I used mild)
    2 TBS Onion, smallest dice you can do
    2 TBS Red Bell pepper, smallest dice you can do

    1. Drain the tomatoes and chiles (Rotel) and add to your food processor or blender. Blend until smooth and remove from the blender. Add the onion and pepper.
    2. The whole cup of sauce has less than 60 calories.

    Monday, October 18, 2010

    Apple Pie Baked in a Bag

    Even since I saw the Bobby Flay apple pie throwdown episode I have wanted to try making an apple pie in a brown paper bag. I wondered if it truly made a difference or if it was all just hype. This afternoon I found myself with two bushels of pie apples and a paper bag. It was time. I adapted the recipe from here. Although the pie turned out really well I am still not convinced that it is better then my grandma's. That being said the pie turned out really well. It had a nice flaky crust, it was not brown or hard around the outside and the apples were well cooked and juicy. I think it turned out pretty good for my second attempt at making an apple pie!


    Crust :
    1 cup + 3 tbsp all-purpose flour
    2 tsp granulated sugar
    1/2 tsp salt
    1/2 cup + 2 Tbsp cool unsalted butter
    1 large egg
    1 tbsp cold water
    Filling:
    5 Granny Smith apples, peeled, cored, and thickly sliced
    1/2 Cup sugar
    1-1/2 Tablespoons cornstarch
    1 Teaspoon fresh lemon juice
    1 Teaspoon pure vanilla extract
    1/4 Teaspoon ground cinnamon
    1/8 Teaspoon salt
    1/8 Teaspoon ground nutmeg
    1-1/2 Tablespoons cold unsalted butter, cut into pieces.

    Equipment:
    9-inch aluminum pie pan, 1 medium-sized brown paper bag.


    .

    Make the Crust:
    IIn a mixer fitted with a paddle attachment, combine flour, sugar and salt. Cut butter into small pieces (you can pull the butter from the fridge 30 minutes before adding) and add to flour, mixing until dough is a rough, crumbly texture. Whisk egg and water and add at once, mixing until dough comes together. Shape dough into 2 discs, wrap in plastic and chill for at least one hour.

    On a work surface lightly dusted with flour, roll out 1 disk to a circle about 1/8-inch thick. Keep rolling until the circle is at least 2 inches larger than your pan. Line the pie pan with the dough, letting the edge hang over a bit. Roll the second disk, place it on a sheet pan and chill it until you're ready to build your pie.

    Arrange a rack in the center of the oven and preheat to 375 degrees F..

    Make the Filling:
    In a medium bowl, toss the apple slices, sugar, cornstarch, lemon juice, vanilla, cinnamon, salt, and nutmeg together. Transfer to the pie shell and dot with the butter. Brush the overhanging edges of the dough with water. Carefully cover with the rolled-out top crust and pinch the edges together, turning them under all around to make a thick edge. To decorate the rim, press it all around with the back of a fork, or just pinch it to seal. With a scissors, cut a few V-vents in the center.
    Slide the pie into the brown paper bag and fold the top down. Staple bag shut and place it on a sheet pan. Bake for 1 hour.
    Remove the pie from the oven and cut a large circle in top of the bag. Return to the oven and bake until the crust is golden brown, about 15 minutes more.
    Let the pie cool at least 30 minutes before serving. Serve warm or at room temperature.

    Sunday, October 17, 2010

    Sweet Potaote Apple soup

    I really enjoy creamy thick soups and generally speaking so do my children, however because I am trying to make a new meal everyday I have had to use some new soup recipes. Tonight I adapted this recipe. The recipe turned out quite well and best of all three out of four of my children ate it.


    Ingredients
    3 medium sweet potatoes
    1 tablespoon unsalted butter
    2 tablespoon olive oil
    1 small onion, chopped
    2 cloves garlic, smashed
    1 tsp ginger
    1/4 teaspoon freshly grated nutmeg, plus more for garnish
    1 1/2 teaspoons curry powder
    Kosher salt and freshly ground pepper
    2 cups low-sodium chicken broth
    4 medium apples
    1 tablespoon extra-virgin olive oil
    1 tablespoon apple cider vinegar


    Directions
    Preheat the oven to 400 degrees F. Peel and dice 2 1/2 sweet potatoes, the apples and the onions. Place on cookie sheets with the garlic drizzle with 2 TBSP of olive oil. Place the vegetables in the oven and roast for 40 minutes stirring halfway through. While the vegetables are roasting bring the water and the chicken stock to a simmer. When the vegetables are done put them in the pot with the hot water and stock. Use an immersion blender and puree. Stir in the ginger, nutmeg, 1 1/4 teaspoons curry powder, and salt and pepper to taste. Keep warm (you may need to add more stock or water mine was a little bit thick.)
    Meanwhile, peel and thinly slice the remaining 1/2 sweet potato and toss with the olive oil, and salt and pepper to taste. Spread in a single layer on a baking sheet and bake until crisp, 7 to 10 minutes.
    Heat 1 tablespoon butter in a skillet over medium heat. Add the remaining 1/4 teaspoon curry powder and cook, stirring, until browned; remove from the heat and add the vinegar. Top with the curry butter and sweet-potato chips.

    Saturday, October 16, 2010

    Grape Focaccia

    One of my favourite chefs to watch on TV is Anna Olson and I have tried a lot her recipes.  The other night when I was making my root beer chicken  I was pondering what I could serve as a side dish and I remember seeing this recipe on her cooking show in the spring and wanting to try it.  However since grapes were not in season I simply forget about the recipe.  When I was at the grocery store this week grapes were on sale and that triggered my memory about his bread.  Even though the bread was made from scratch.  It was really easy and yummy!  It is almost like a dessert bread with all that sugar on it.


    Ingredients
    2 1/2 teaspoons (1 pkg) instant dry yeast
    3 tablespoons grape juice
    1 tablespoon honey
    1 cup tepid water (just above body temperature)
    1 ½ cups all-purpose flour and 1 to 1 ½ cups pastry flour
    1/4 cup plus 2 tbsp extra-virgin olive oil
    3/4 teaspoon salt
    1 cup grapes
    1/3 cup Turbinado sugar
    Directions
    Stir together yeast, juice, honey, and warm water in a large bowl. Stir in 1 cup flour (mixture will be lumpy). Cover bowl with plastic wrap and let rise in draft-free place about 40 minutes, until doubled in size.
    Add ¼ cup olive oil, 1 ½ cups flour, and salt and stir until a sticky dough forms. Knead dough on a floured work surface; gradually adding up to 1/2 cup more flour if necessary to keep dough from sticking, until dough is smooth and elastic but still soft, 8 to 10 minutes (I prefer doing this by hand, instead of in a mixer). Place dough in an oiled bowl, cover with plastic wrap and let rise an hour, until doubled in size.
    Turn out dough onto a lightly floured work surface and knead for a moment. Cut dough in half and roll out 1 piece of dough (keeping remaining piece covered) to a rectangle 9-x-13-inches. Transfer dough to a lightly oiled 9-x-13-inch pan and sprinkle with half of the grapes and sugar. Roll out second piece of dough to same size and cover grapes. Spread remaining grapes on top of dough and gently press in. Sprinkle with sugar and cover with a tea towel to rest 30 minutes.
    Preheat oven to 400F and bake focaccia until richly golden, about 40 minutes. While still warm, brush with remaining 2 Tbsp olive oil.

      Friday, October 15, 2010

      Root Beer Can Chicken

      I have been seeing recipe's and cooking contraptions for can chicken and I was curious. How would this work? What would the chicken taste like? Would it be worth it? I am here to tell you that it is easy, good and well worth it! I was surprise as how easy this chicken was to make. You basically prepare the rub, apply it to the chicken, stick the chicken on the can, make your foil smoking pouch, place the chicken on the BBQ and then forget about it for an hour and a half (you do have to occasionally turn it though). This chicken was moist, and flavourful. I recommend you call try this. I am going to try this again and the next time I am going to use coke.


      Ingredients
      Original recipe here
      4 pound chicken
      1/4 cup paprika
      2 tablespoons brown sugar
      1 teaspoon kosher salt
      1 heaping teaspoon cayenne pepper
      1 teaspoon onion powder
      1 teaspoon garlic salt
      1 teaspoon chili powder
      2 tablespoons butter, melted
      1/2 can of root beer, not diet
      3 cups apple wood smoking chips
      1 disposable aluminum pie plate (or drip pan)
      1 tablespoon honey
      Directions


      Soak the wood chips in water for at least 2 hours.


      When ready to grill, preheat 1 of the burners to 350 degrees F.


      Make sure the chicken is clean and innards are removed; pat dry with a paper towel and set aside. In a small mixing bowl, add paprika, brown sugar, kosher salt, cayenne pepper, onion powder, garlic salt, chili powder and mix well. Take the chicken and separate the skin from the breast taking care not to tear or removeskin. Apply the spice rub directly to the chicken breast, under the skin. Apply rub to the entire chicken, inside and out, reserving at least 2 tablespoons. Pop the can and pour half of the root beer out. In a new bowl, mix butter and remaining spice rub. Add this mixture to the half-full can of root beer. Place chicken over root beer can and insert into the cavity of the chicken, keeping beer can standing up.


      Place the wood chips in a foil smoker pouch over the active burner on the grill and set the chicken, on a pie plate, over the in-active burner. Close the lid. Rotate the chicken every 20 minutes. 5 minutes before cooking is complete, drizzle the honey over the chicken. The chicken should take about 1 hour and 20 minutes to cook, or until an instant-read thermometer registers 155 degrees F. Slice and serve.

      Wednesday, October 13, 2010

      Sloppy Joes Not From a Can

      I have found memories of eating sloppy joes while growing up. They were a quick supper that mom could throw together and that everyone would enjoy. I decided that I wanted to pass the sloppy joe tradition on to my family, however my first few attempts did not meat with my little cridicts approval. When I came across this recipe here, I hoped that this time things would be different, sadly I was dissapointed. Only three out of six of us ate it. Although my husband, myself and my eldest all thought that it was yummy my other three children refused to even touch it. However becuase they would not even taste it I do not know if they liked it or not. I guess I will just have make it again to find out!


      Sloppy Joes


      For the best flavor, make the tomato sauce ahead of time, and store it in the refrigerator for at least an hour so the flavors can meld together.
      Serves 4
      · 2 tablespoons vegetable oil
      · 1/2 medium onion, chopped finely
      · 1/2 teaspoon salt
      · 2 cloves garlic, minced
      · 2 teaspoons chili powder
      · 1 pound ground sirloin
      · Freshly ground black pepper, to taste
      Tomato Sauce:
      · 1 15-ounce can tomato sauce
      · 1/4 cup water
      · 1/4 cup dark brown sugar
      · 1 to 2 tablespoons red wine vinegar
      · 1 tablespoon Worcestershire sauce
      · 1 tablespoon yellow mustard
      · 1 to 2 teaspoons crushed red pepper flakes
      · 2 tablespoons tomato paste
      · 4 hamburger buns
      · Butter, for spreading on hamburger buns


      1. In a large skillet, heat the oil to medium-high. Add onion and salt, lower heat to medium, and sauté until the onion is soft and translucent, about 5 minutes.
      2. Add garlic and chili powder, and cook for about 30 seconds.
      3. Add beef, and cook for about 3 minutes, breaking it up as you stir. (The meat will still be a little pink when you move on to step 5. Don’t worry. It will keep cooking as it simmers in the tomato sauce.)
      4. In the meantime, grab a medium bowl, and combine the tomato sauce, water, brown sugar, red wine vinegar, Worcestershire sauce, yellow mustard and red pepper flakes.
      5. Add the tomato mixture to the beef. Stir in the tomato paste. Simmer for at least 10 minutes, or until the mixture reaches your desired consistency. (If it seems a little “wet,” just keep simmering.)
      6. To Prep the Hamburger Buns: Warm a skillet over medium heat. Butter the insides of the buns, and place them butter-side down in the skillet. Toast.
      7. Taste the Sloppy Joe mixture, and adjust the seasonings. Sandwich the mixture in the hamburger buns, and serve.

      Tuesday, October 12, 2010

      Pumpkin Cranberry Muffins


      As a result of it being thanksgiving week-end the grocery stores were just bursting with fresh produce. While I was shopping I spotted bags of fresh cranberries and picked some up. I had not yet decided what I was making for thanksgiving dinner and thought if I was making turkey I could make a cranberry sauce with the kids. When I decided to make ribs for thanksgiving supper I needed something to do with my cranberries so I decided to try this recipe by Anna Olson using fresh cranberries instead of the dried ones I normally use. The muffins turned out, light and sweet. The tart cranberries were a nice contrast in both colour and taste to the sweet pumpkin.


      Yield: 48 mini muffins or 24 regular muffins
      Ingredients
      2 cups flour
      1 teaspoon baking soda
      1 teaspoon baking powder
      1 teaspoon salt
      1/2 teaspoon cinnamon
      1/2 teaspoon cloves
      1/2 teaspoon ginger
      1/2 cup unsalted butter, room temperature
      1 cup sugar
      2 egg
      1 cup canned pumpkin puree
      zest of one orange
      1 teaspoon vanilla
      1 cup orange, juice
      1 1/2 cups cranberries, fresh or frozen

      Directions
      Preheat oven to 325ºF.
      Sift together flour, baking soda and powder, salt and spices and set aside.
      In a medium bowl, cream together butter and sugar until light and fluffy. Add eggs, one at a time, and stir in pumpkin purée, orange zest and vanilla. Stir in orange juice. Add dry ingredients in additions and blend just until incorporated. Fold in cranberries.
      Spoon batter into muffin tins and bake in center of oven for 15-20 minutes until a tester inserted into the muffins comes out clean. Allow to cool before eating.
      I have also made these muffins using dried cranberries and had it turn out quite nice.

      Key Lime Pie Ice Cream

      While I was at the grocery store the other day I spotted bags of key limes.  I immediately grabbed two bags as I had been waiting to try my hand at making a real key lime pie.  I went home and searched through my cookbooks to find a good key lime pie recipe.  I settled on this recipe from Anna Olson.  The recipe said that traditionally key lime pie is not cooked but that the filling cooks withe acidity of the limes.  I was skeptical but decided to give it a try.  I spend 1 hour juicing and zesting all my key limes.  They are much smaller they regular limes and thus take a long time.  I then made my pie and put in in the fridge anxiously waiting for my first bite the next day.  I was sorely disappointed.  When I cut into the pie it ran all over the place, it had not set.  I am not sure if it was just a bad recipe or if I did something wrong because my Grandma said that does not cook her key lime pie either, I guess next time I will have to try Grandma's recipe.  However, I was not about to let all that delicious filling go to waste, so I pulled my trustee ice-cream maker out of the freezer and scooped the filling into it.  Half an hour later I had homemade key lime pie ice-cream.  It is creamy, smooth and not hard like regular homemade ice-cream because of all the sugar.  However it is also very tart so you only need a small scoop.  So I would not recommend making this pie and you could try your hand and turning it into ice-cream!


      Ingredients
      Crust
      3 cups graham cookie crumbs
      1 cup sweetened coconut
      1/2 teaspoon salt
      3/4 cup unsalted butter
      Filling
      3x7 ounce tins condensed milk
      12 ounces pasteurized egg yolks (about 12 yolks)
      1 1/2 cups fresh lime juice
      1 1/2 tablespoons lime zest
      Directions

      To Assemble
      CRUST: Preheat oven to 375° F. Combine chocolate cookie crumbs, coconut and salt. Stir in melted butter and blend until an even, crumbly texture. Press crust into an ungreased 9 1/2-inch springform pan. Bake for 7 to 8 minutes, until coconut browns. Allow to cool.
      FILLING: Whisk together all ingredients until smooth and pour into baked pie shell. Chill for at least 4 hours before slicing.

      Monday, October 11, 2010

      Pumpkin Pie Brioche Sticky Buns

      Fall if my favourite time of year for baking.  I am itching to try new pumpkin, apple and pie recipes.  However there is only so much food that my family can consume without being detrimental to their health.  Lucky for me this week-end is Thanksgiving and two of my children's birthdays, a perfect excuse to have brunch and try the recipe for Pumpkin Pie Brioche Sticky Buns that I found on a blog a couple of weeks ago.  They were sticky, sweet, yummy and most importantly easy! The brioche recipe can be found here in another post.


      Pumpkin Pie Brioche Sticky Buns
      Ingredients
      1/2 pound (2 sticks) butter, room temperature
      1/2 cup packed brown sugar
      1/2 cup granulated sugar
      1/2 tsp salt
      1/2 cup corn syrup
      1 tsp vanilla extract
      1/2 cup cranberries
      1/2 cup pecan pieces

      Directions
      Cream butter, sugars and salt for 2 minutes on high speed with paddle attachment. Add corn syrup and extract and cream until light and fluffy, about 5 minutes. Cover the bottom of jumbo muffin tins or baking dish with approximately 1/4" layer of mixture. Then sprinkle with chopped pecans and dried cranberries. On top of the cranberry pecan mixture put one lump of dough so that the muffin tin is approximately two thirds full. Cover the pan. I covered the pan and put it in the fridge overnight. In the morning I baked them at 350°F for about 20-25 minutes.I turned them out onto another pan after about 5 minutes and let the caramel glaze cover the turned out buns.

      Baked Monterey Jack and Ham Omelet

      I made this when I made the pancetta and cinnamon waffles for supper.  Again I knew that my kids liked waffles and they liked ham so I thought that this would be safe bet for supper.  This was supper easy and quick and we did not have any leftovers, always a good sign.  If I was ever hosting a brunch I would make this recipe again as it was quick and let stressful then making a whole bunch of individual omelets.  They only downside is that they cannot be personalized however the big plus side is that I do not have to spend a lot time cooking at the stove.


       Baked Monteray Jack and Ham Omelet
      Original recipe here
      Ingredients
      Butter, for greasing baking dish
      2 tablespoons olive oil
      1 small onion, diced
      1/2 pound cooked ham
      8 large eggs
      1/3 cup whole milk
      1 teaspoon kosher salt
      Freshly ground black pepper
      1 red bell pepper, diced
      1 1/2 cups (4 ounces) grated Monterey jack cheese
      Directions


      Preheat the oven to 425 degrees F. Lightly butter an 8 by 8-inch baking dish.
      Heat the oil in a medium skillet over medium-high heat. Add the onion and cook until translucent, about 3 minutes.
      In a large bowl, whisk together the eggs, milk, salt and pepper, to taste, until smooth, about 20 seconds. Add the red bell pepper, ham and 1 cup of Monterey jack cheese. Stir in the onion mixture. Pour the batter into the prepared pan. Sprinkle with the remaining cheese. Bake for 20 to 25 minutes or until golden brown.
      Cut the baked omelet into wedges and serve.

      Pancetta and Cinnamon Waffles

      wfI wanted to make a recipe that I knew no one would complain about for supper tonight so I decided on waffles, because who does not like waffles.  However I was making supper waffles so they needed a few extra things, like pancetta (Italian bacon) and pecans.  I judge their success on the silence that surrounded my dinner table while these were being consumed. This was served with a baked Monterey Jack and ham omelet and the recipe can be found here.


      Pancetta and Cinnamon Waffles

      Original recipe here 

      Ingredients
      1 tbsp Olive Oil
      1/2 cup maple syrup
      3 4 ounce peices of pancetta
      1 1/2 teaspoons groud cinnamon
      1/4 teaspoon ground nutmeg
      2 2 cups all-purpose flour
      1 1 teaspoon salt
      4 4 teaspoons baking powder
      2 2 tablespoons white sugar
      2 eggs
      1 1 1/2 cups warm milk
      11/3 cup butter, melted
      1 1 teaspoon vanilla extract
      Directions
      1. Heat the oil in a medium skillet over medium-high heat. Add the pancetta and cook until brown and crispy, about 3 to 5 minutes. Transfer the pancetta to a paper towel-lined baking sheet to cool.
      2. In a large bowl, mix together flour, pecans pieces, cinnamon, nutmeg, salt, baking powder and sugar; set aside. Preheat waffle iron to desired temperature.
      3. In a separate bowl, beat the eggs. Stir in the milk, butter and vanilla. Pour the milk mixture into the flour mixture; stir until blended.
      4. Ladle the batter into a preheated waffle iron. Cook the waffles until golden and crisp.
      5. Place waffles onto serving plates. Drizzle with maple syrup. Serve immediately.